실습에 앞서 Maven에 대한 이해를 위해 아래 링크를 통해 Maven에 대해 알아보자.
[출처] https://myjamong.tistory.com
[Spring] Maven 사용하는 이유, 알아야하는 이유 :: 마이자몽
Maven 이란? Spring MVC 프로젝트를 진행하면서... 이클립스를 이용하면서 Maven이라는 단어를 들어보셨나요? 네. 아마 한번쯤은 들어봤을겁니다. 왜냐하면 이클립스를 이용하는 사람이라면 이미 사용했습니다...
myjamong.tistory.com
Maven Spring MVC 프로젝트 생성
대부분의 Spring MVC 프로젝트는 이클립스 에디터를 이용해서 개발하다보니 Maven의 명령어들을 직접 사용하면서 Spring MVC 프로젝트를 빌드하는 경우는 많이 않을 것이다. 그래서 이번 실습은 VSCode라는 에디터를 사용해서 직접 터미널에 명령어를 입력해 Spring MVC 프로젝트를 생성해 보려고한다. 이번 실습은 사전에 VSCode와 Maven을 설치한 상태에서 진행해야합니다.
VSCode 에디터 설치가 아직 안되어 있다면 공식홈페이지에서 각 OS에 맞게 설치해주자.
[출처] https://myjamong.tistory.com
Visual Studio Code - Code Editing. Redefined
Visual Studio Code is a code editor redefined and optimized for building and debugging modern web and cloud applications. Visual Studio Code is free and available on your favorite platform - Linux, macOS, and Windows.
code.visualstudio.com
Maven 설치와 관련해서는 아래 링크를 통해 진행하자. MacOS와 Window모두 아래 내용과 비슷한 절차를 통해 설치가 된다. Window의 경우 zip형태로 받아줄 것과 환경변수 설정방법을 알고있다면 아래 내용대로 따라해도 됩니다.
[출처] https://myjamong.tistory.com
[CentOS 7] Maven 설치 :: 마이자몽
Maven 이란? 라이브러리를 관리해주는 도구이다. 메이븐 설치를 위해 아파치재단 메이븐 프로젝트로 들어가 download로 들어간다. 최신 버전을 원하면 바로 보이는 링크를 사용하여 설치를 해주고, 이전 버전을 원..
myjamong.tistory.com
Maven 프로젝트 생성
첫 단계는 터미널을 이용해서 프로젝트를 생성할만한 경로로 이동해준 후 아래 명령을 실행해준다.
mvn archetype:generate위 명령을 실행하면 Maven을 사용하는데 필요한 플러그인들의 설치와 함께 프로젝트를 생성하는데 필요한 정보들을 요구하는 단계를 거쳐간다. 아래 단계의 내용은 Maven의 버전에 따라 필자와 조금씩 다를 수 있습니다.
1단계. 필터 적용
Choose a number or apply filter (format: [groupId:]artifactId, case sensitive contains): 1476: 기본 엔터 넘기기
2단계. 버전 선택
Choose org.apache.maven.archetypes:maven-archetype-quickstart version:
1: 1.0-alpha-1
2: 1.0-alpha-2
3: 1.0-alpha-3
4: 1.0-alpha-4
5: 1.0
6: 1.1
7: 1.3
8: 1.4
Choose a number: 8:
기본 엔터 넘기기
3단계. groupId
Define value for property 'groupId': 주로 어떤 특정한 단체의 url주소를 사용하며 Spring MVC 프로젝트를 이클립스에서 생성시 패키지 com.example.www 의 com.example 부분을 사용하게 됩니다.
필자는 블로그 주소를 예시로 하여 com.tistory로 정하겠습니다.
4단계. artifactId
Define value for property 'artifactId': 프로젝트의 식별값 입니다. Spring MVC 프로젝트를 이클립스에서 생성시 패키지 com.example.www에서 www부분을 말합니다.
필자는 myjamong으로 하겠습니다.
5단계. version
Define value for property 'version' 1.0-SNAPSHOT: :프로젝트의 버전을 입력합니다. 변경없이 그대로 기본 엔터 하겠습니다.
6단계. package
Define value for property 'package' com.tistory: :생성할 패키지의 경로를 입력합니다. 기본 엔터를 누를 시 groupId 그대로 갖고 갑니다.
7단계. 입력한 정보 확인
Confirm properties configuration:
groupId: com.tistory
artifactId: myjamong
version: 1.0-SNAPSHOT
package: com.tistory
 Y: :
확인 후 정보에 이상이 없다면 기본 엔티.
이상없이 모든 단계가 다 끝나면 아래와 같이 BUILD SUCCESS 로그가 남고 artifactId명으로 폴더가 생성된 것을 확인 할 수 있습니다.

프로젝트 기본 구조
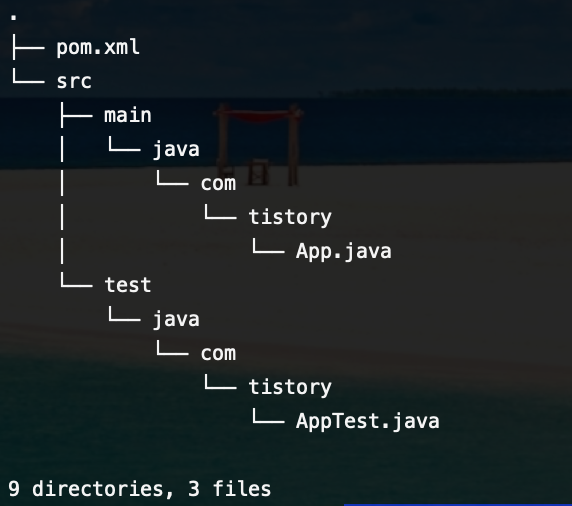
이렇게 Maven 구조가 완성되었습니다. 이제는 MVC형태로 폴더와 파일을 생성하고 pom.xml파일을 수정하여 필요한 라이브러리들을 설치할겁니다.
MVC 구조 만들기
VSCode를 설치 하셨다면, 터미널 해당 경로에서 아래 명령어를 입력하면 해당 위치에서 에디터가 실행됩니다.
code .
1단계. pom.xml 수정
첫 생성된 pom.xml은 플러그인 종류많았을 겁니다. 일단 실행에 필요한 플러그인 만 남기고 packaging을 war형태로 바꾸고 Spring에 필요한 기본 dependency만 추가했습니다.
<?xml version="1.0" encoding="UTF-8"?>

<project xmlns="http://maven.apache.org/POM/4.0.0" xmlns:xsi="http://www.w3.org/2001/XMLSchema-instance"
  xsi:schemaLocation="http://maven.apache.org/POM/4.0.0 http://maven.apache.org/xsd/maven-4.0.0.xsd">
  <modelVersion>4.0.0</modelVersion>

  <groupId>com.tistory</groupId>
  <artifactId>myjamong</artifactId>
  <version>1.0-SNAPSHOT</version>
  <packaging>war</packaging>

  <name>myjamong</name>

  <properties>
    <org.springframework-version>4.3.2.RELEASE</org.springframework-version>
  </properties>

  <dependencies>
  <!-- Spring -->
		<dependency>
			<groupId>org.springframework</groupId>
			<artifactId>spring-context</artifactId>
			<version>${org.springframework-version}</version>
		</dependency>
		<dependency>
			<groupId>org.springframework</groupId>
			<artifactId>spring-webmvc</artifactId>
			<version>${org.springframework-version}</version>
		</dependency>
  <!-- JUnit -->
    <dependency>
      <groupId>junit</groupId>
      <artifactId>junit</artifactId>
      <version>4.11</version>
      <scope>test</scope>
    </dependency>
  </dependencies>

  <build>
      <plugins>
        <plugin>
          <artifactId>maven-compiler-plugin</artifactId>
          <version>3.8.0</version>
            <configuration>
              <source>1.8</source>
              <target>1.8</target>
              <encoding>UTF-8</encoding>
            </configuration>
        </plugin>
      </plugins>
  </build>
</project>
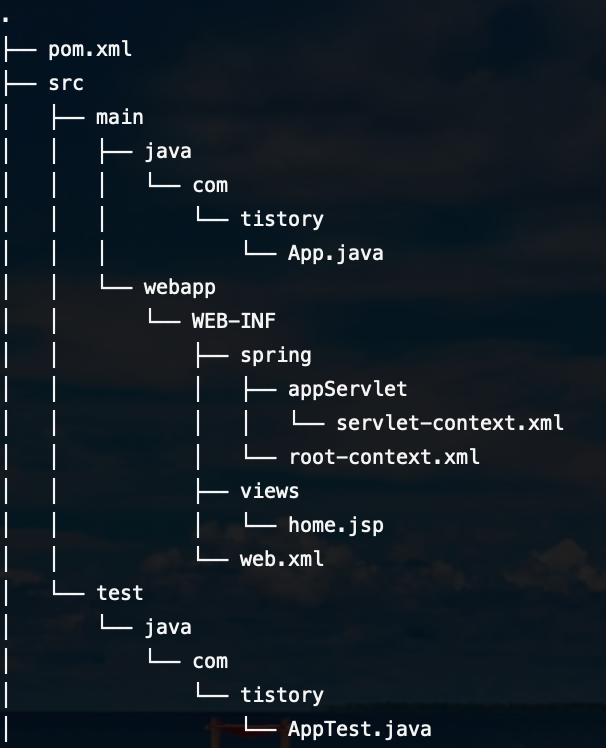
2단계. WEB-INF 구조 만들기
아래와 같이 웹 프로젝트를 구성하기 위한 WEB-INF 폴더와 구조를 만든다.
web.xml
<?xml version="1.0" encoding="UTF-8"?>
<web-app version="2.5" xmlns="http://java.sun.com/xml/ns/javaee"
	xmlns:xsi="http://www.w3.org/2001/XMLSchema-instance"
	xsi:schemaLocation="http://java.sun.com/xml/ns/javaee https://java.sun.com/xml/ns/javaee/web-app_2_5.xsd">

	<!-- The definition of the Root Spring Container shared by all Servlets and Filters -->
	<context-param>
		<param-name>contextConfigLocation</param-name>
		<param-value>/WEB-INF/spring/root-context.xml</param-value>
	</context-param>

	<!-- Creates the Spring Container shared by all Servlets and Filters -->
	<listener>
		<listener-class>org.springframework.web.context.ContextLoaderListener</listener-class>
	</listener>

	<!-- Processes application requests -->
	<servlet>
		<servlet-name>appServlet</servlet-name>
		<servlet-class>org.springframework.web.servlet.DispatcherServlet</servlet-class>
		<init-param>
			<param-name>contextConfigLocation</param-name>
			<param-value>/WEB-INF/spring/appServlet/servlet-context.xml</param-value>
		</init-param>
		<load-on-startup>1</load-on-startup>
	</servlet>

	<servlet-mapping>
		<servlet-name>appServlet</servlet-name>
		<url-pattern>/</url-pattern>
	</servlet-mapping>

</web-app>
root-context.xml
<?xml version="1.0" encoding="UTF-8"?>
<beans xmlns="http://www.springframework.org/schema/beans"
	xmlns:xsi="http://www.w3.org/2001/XMLSchema-instance"
	xsi:schemaLocation="http://www.springframework.org/schema/beans https://www.springframework.org/schema/beans/spring-beans.xsd">

	<!-- Root Context: defines shared resources visible to all other web components -->

</beans>
servlet-context.xml
<?xml version="1.0" encoding="UTF-8"?>
<beans:beans xmlns="http://www.springframework.org/schema/mvc"
	xmlns:xsi="http://www.w3.org/2001/XMLSchema-instance"
	xmlns:beans="http://www.springframework.org/schema/beans"
	xmlns:context="http://www.springframework.org/schema/context"
	xsi:schemaLocation="http://www.springframework.org/schema/mvc https://www.springframework.org/schema/mvc/spring-mvc.xsd
		http://www.springframework.org/schema/beans https://www.springframework.org/schema/beans/spring-beans.xsd
		http://www.springframework.org/schema/context https://www.springframework.org/schema/context/spring-context.xsd">

	<!-- DispatcherServlet Context: defines this servlet's request-processing infrastructure -->

	<!-- Enables the Spring MVC @Controller programming model -->
	<annotation-driven />

	<!-- Resolves views selected for rendering by @Controllers to .jsp resources in the /WEB-INF/views directory -->
	<beans:bean class="org.springframework.web.servlet.view.InternalResourceViewResolver">
		<beans:property name="prefix" value="/WEB-INF/views/" />
		<beans:property name="suffix" value=".jsp" />
	</beans:bean>

	<context:component-scan base-package="com.tistory" />


</beans:beans>
home.jsp
<html>
<head>
	<title>Home</title>
</head>
<body>
<h1>
	${text}
</h1>
</body>
</html>
App.java
기존 내용 수정.
package com.tistory;

import org.springframework.stereotype.Controller;
import org.springframework.ui.Model;
import org.springframework.web.bind.annotation.RequestMapping;
import org.springframework.web.bind.annotation.RequestMethod;

@Controller
public class App {
	@RequestMapping(value = "/", method = RequestMethod.GET)
	public String home(Model model) {
		model.addAttribute("text", "HelloWorld");
		return "home";
	}

}
3단계. Maven 빌드
Maven의 라이프사이클대로 install 명령어를 통해 모든 기본 phase를 진행하겠습니다. 원격 리포지토리는 사용하지 않기 때문에 deploy는 하지 않겠습니다. 라이프사이클에 대한 내용은 아래 링크 참조
[출처] https://myjamong.tistory.com
[Spring] Maven 라이프사이클 알아보기 :: 마이자몽
Maven 라이프사이클 이클립스를 사용해서 Spring MVC Project를 만들고 사용해보셨다면... Maven을 들어봤지만 정확히 무엇을 해주는 것인지? 그리고 어떻게 어떤 원리로 작동하는 것인지 잘 모르고 사용해 왔습니..
myjamong.tistory.com
target 폴더가 생성되어 있을 수도 있으니 순서는 clean 후 install을 진행하겠습니다. 터미널을 이용해서 프로젝트 루트 경로에서 아래 명령을 통해 clean부터 실행합니다.
mvn clean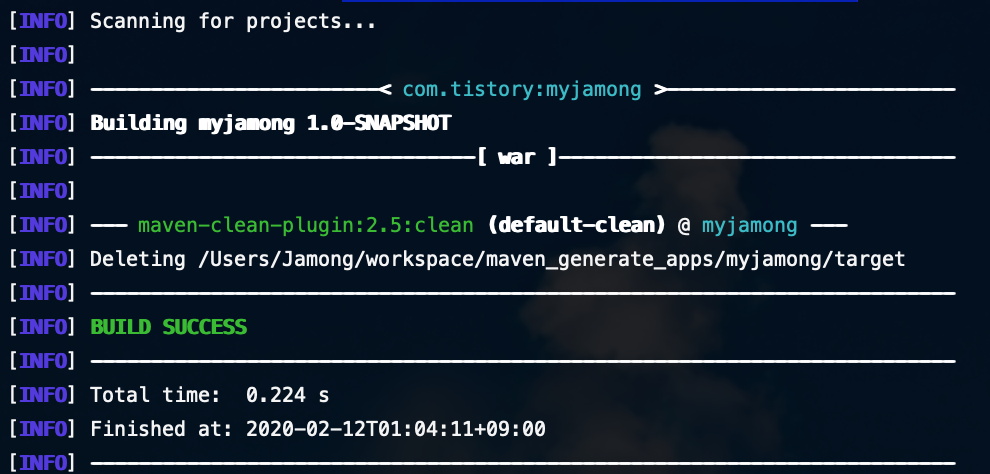
target 폴더가 존재했다면 삭제된것을 확인 할 수 있습니다.
다음은 install 명령을 통해 라이프사이클대로 모든 phase를 진행합니다.
mvn install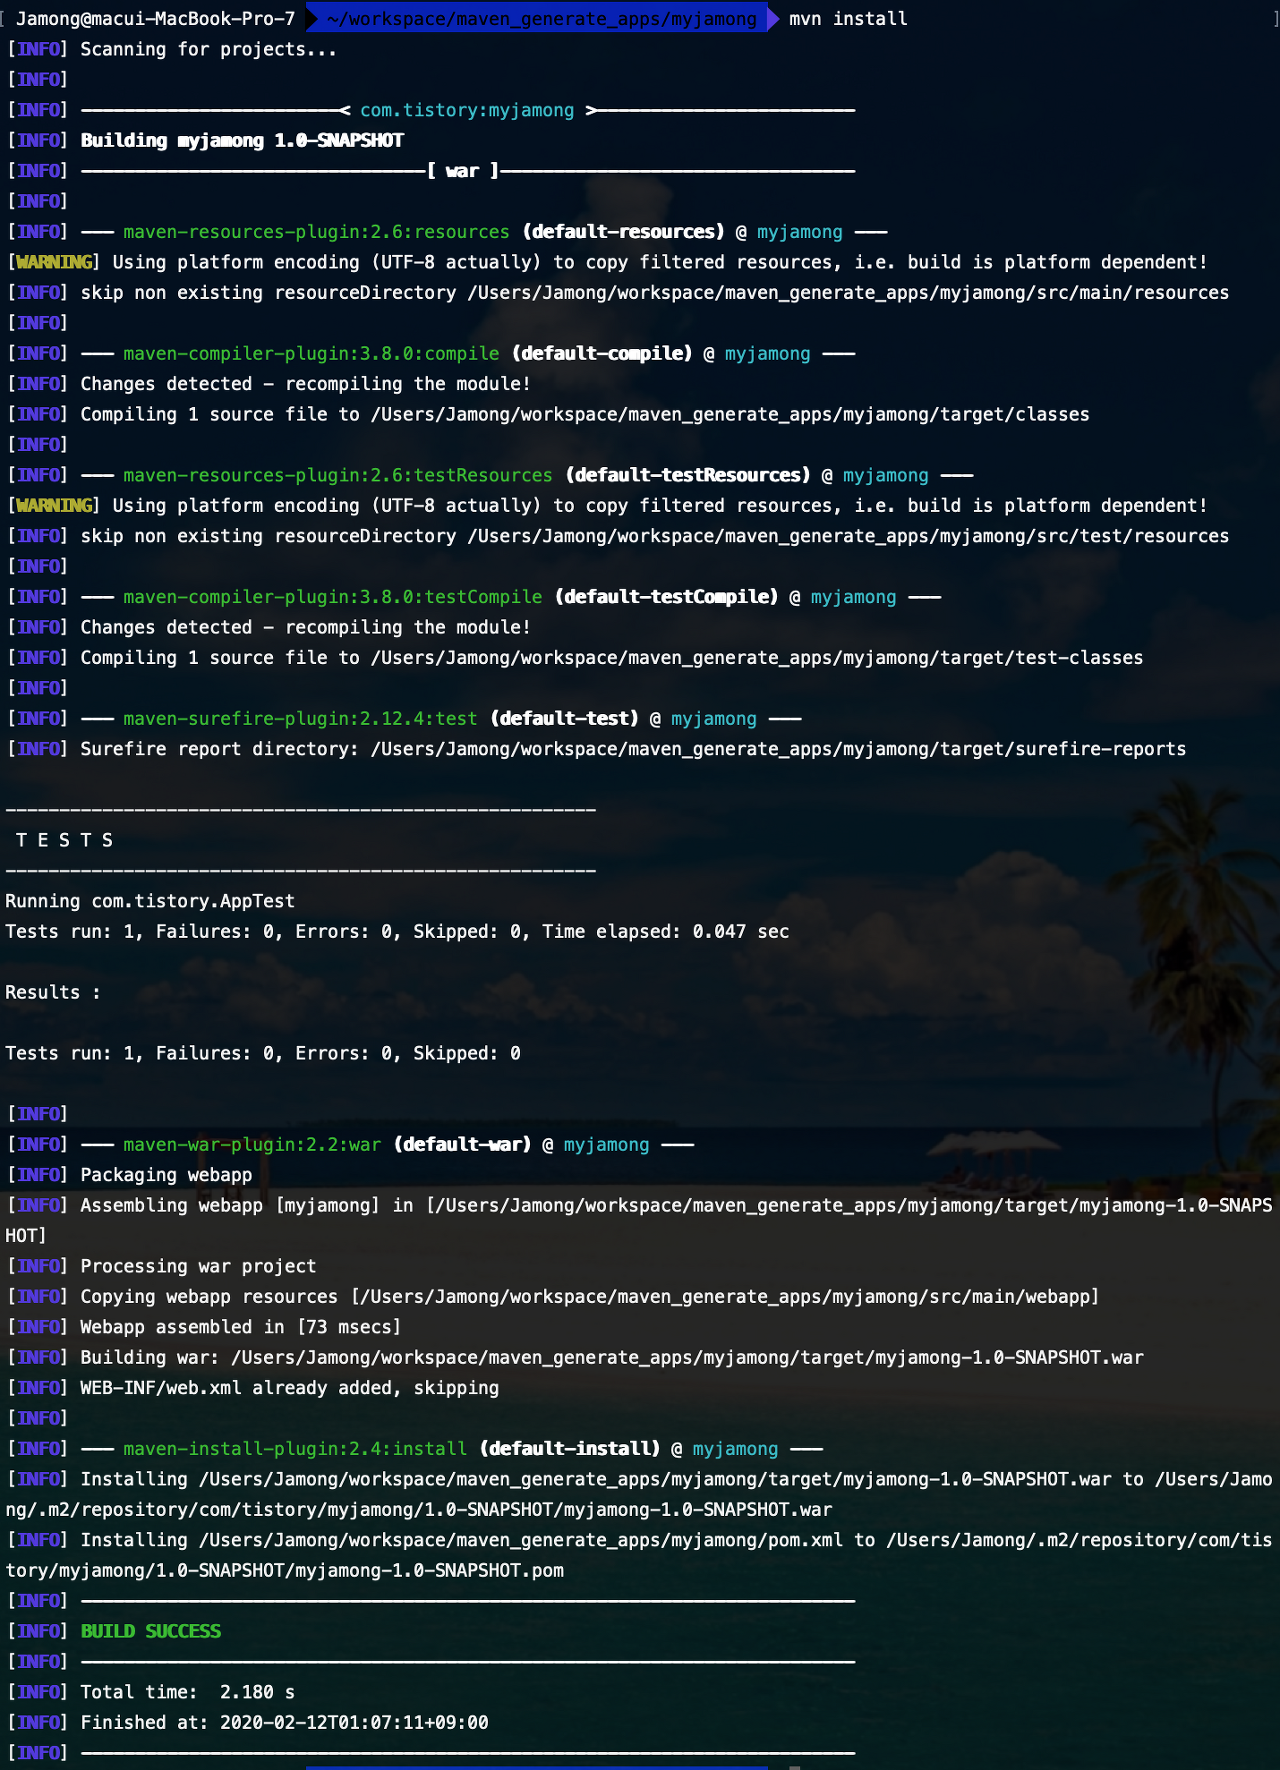
compile 부터 install 단계까지 순차적으로 빌드가 완료되는 것을 확인 할 수 있습니다.
4단계. tomcat 실행 확인
VSCode에서 Tomcat 실행 방법은 아래 링크를 통해 확인해주세요.
단) 해당 글에서 우클릭하여 maven clean 부터 package 작업은 이미 터미널 명령을 통해 했기 때문에 패스 해주시면 됩니다.
[출처] https://myjamong.tistory.com
[Spring] VSCode로 스프링 프로젝트 빌드 :: 마이자몽
VSCode 스프링 프로젝트 빌드 스프링 프레임워크로 개발을 진행할때 이클립스 에디터를 가장 많이사용한다. 프로젝트 생성부터 프로젝트 설정을 편리하게 할 수 있어서 가장 많이 사용되고 자바 개발을 처음 입문..
myjamong.tistory.com
톰캣이 이상없이 올라간 것을 확인 하면 localhost를 통해 붙어보자.
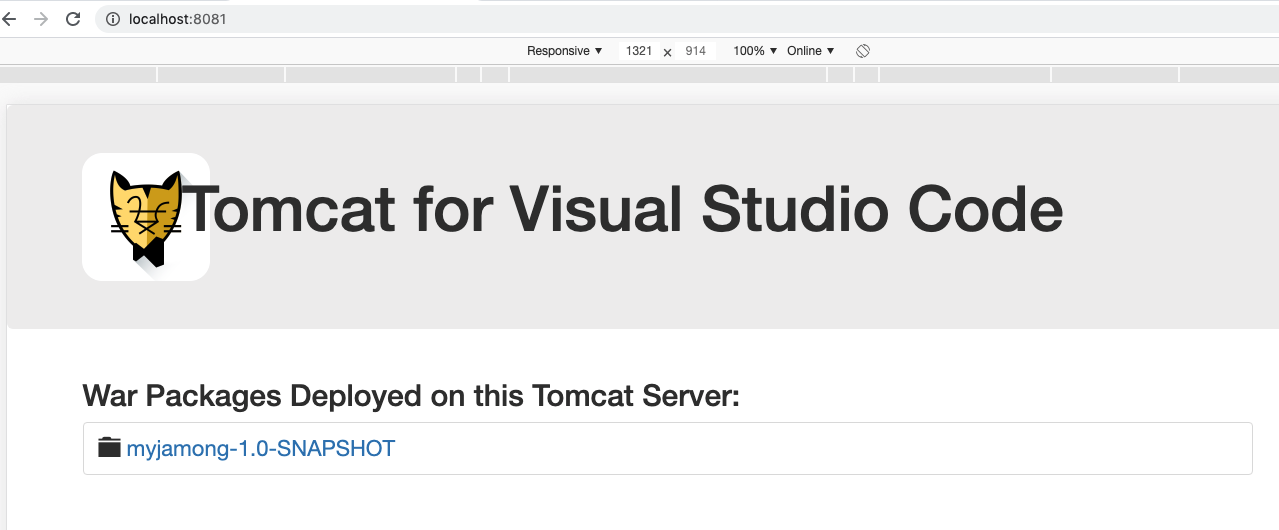
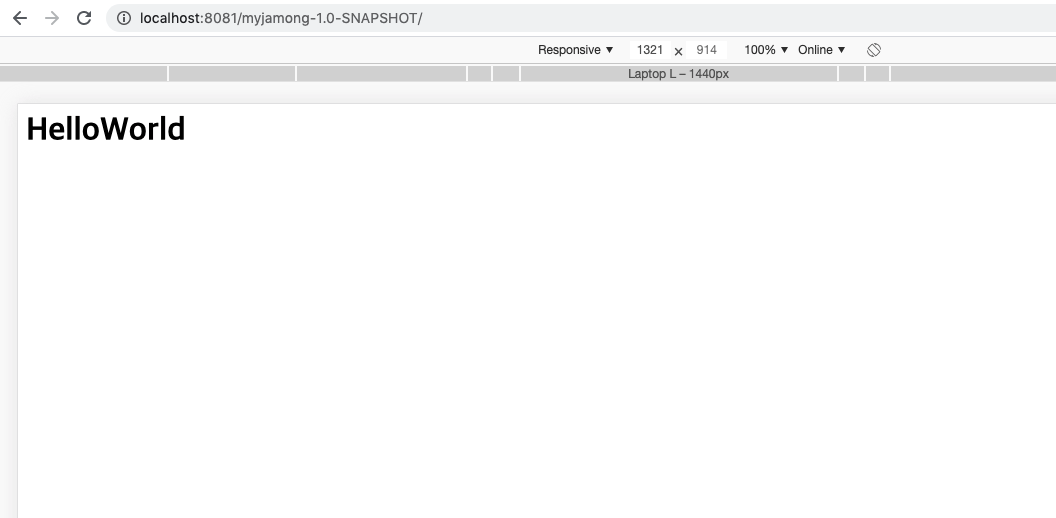
톰캣에 올린 war파일 경로를 클릭하여 아래와 같이 간단하게 HelloWorld가 출력되는 페이지가 나온다면 성공!
정리
이렇게 이클립스를 사용하지 않고 Maven을 이용해서 Spring MVC 프로젝트를 빌드하는 일을 해봤습니다... 생각보다 많은 노력이 필요하지만 확실히 Maven에 대한 이해를 위해서는 이클립스보다는 직접 명령을 통해 내부적으로 어떻게 돌아가는지 아는 것이 중요한 것 같습니다. 딱... 한번만 해보고... 어떻게 하는지 이해 했다면... 앞으로는 그냥 편안하게 다시 이클립스를 이용해서 개발하는 것을 추천 드리네요...ㅋㅋ
이상 Maven으로 Spring 프로젝트를 생성하는 실습 끝!
[출처] https://myjamong.tistory.com/155
[Spring] Maven 이용한 Spring MVC 프로젝트 생성(VSCode 사용) :: 마이자몽
실습에 앞서 Maven에 대한 이해를 위해 아래 링크를 통해 Maven에 대해 알아보자. [Spring] Maven 사용하는 이유, 알아야하는 이유 :: 마이자몽 Maven 이란? Spring MVC 프로젝트를 진행하면서... 이클립스를 이용..
myjamong.tistory.com
